SMUS iOS Email New: Difference between revisions
Jump to navigation
Jump to search
No edit summary |
No edit summary |
||
| Line 5: | Line 5: | ||
{| class="wikitable" | {| class="wikitable" | ||
|- | |- | ||
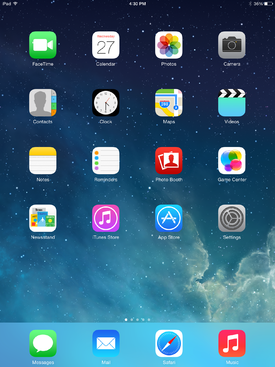
| Go to your device's settings || [[File:1_ipad_mail_config.png| | | Go to your device's settings || [[File:1_ipad_mail_config.png|275px]] | ||
|- | |- | ||
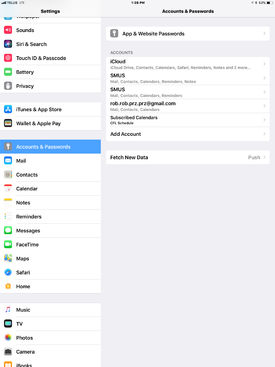
| Choose " | | Choose "Accounts & Passwords" on the left pane, then choose "Add account" on the right pane || [[File:accounts tab.png|275px]] | ||
|- | |- | ||
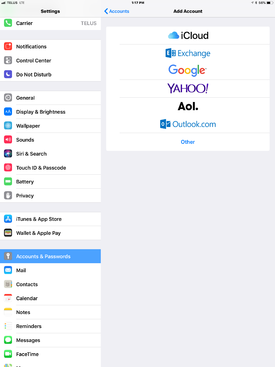
| Choose "Exchange" || [[File: | | Choose "Exchange" || [[File:add account exchange 1.png|275px]] | ||
|- | |- | ||
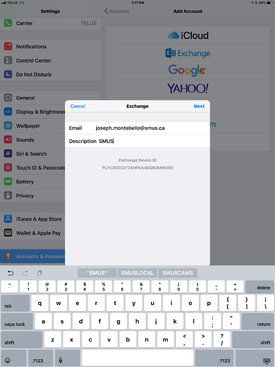
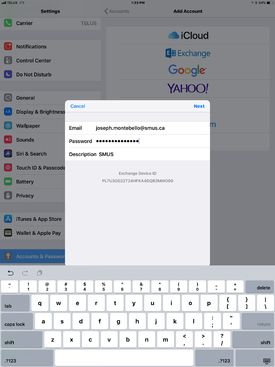
| Enter your email address, password, and a description for the mail account, then tap Next || [[File: | | Enter your email address, password, and a description for the mail account, then tap Next || [[File:add account exchange 2.png|275px]] | ||
|- | |- | ||
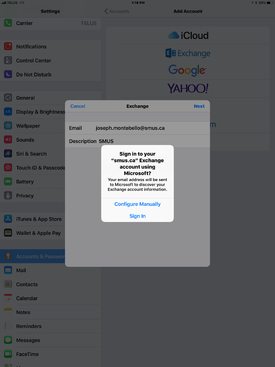
| Pick which items to synchronize, then tap Save || [[File:5_ipad_mail_config.png| | | Choose "Configure Manually" || [[File:add account exchange 3.png|275px]] | ||
|- | |||
| Enter in your password and tap next || [[File:add account exchange 4.png|275px]] | |||
|- | |||
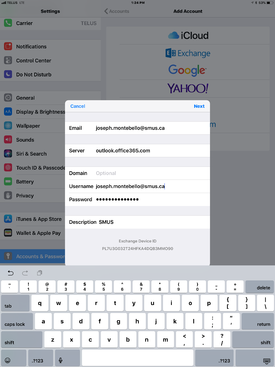
| Set the server to '''outlook.office365.com''' and enter in your SMUS email for your username || [[File:add account exchange 5.png|275px]] | |||
|- | |||
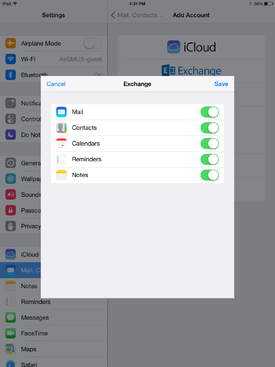
| Pick which items to synchronize, then tap Save || [[File:5_ipad_mail_config.png|275px]] | |||
|} | |} | ||
Revision as of 13:58, 13 February 2018
These instructions cover an iPad running iOS 7. iPhones and iPods should follow the same instructions, but the location of buttons may be in different places.
Follow these steps to connect to your SMUS email from an iOS device.
