SMUS Android Email New: Difference between revisions
Jump to navigation
Jump to search
No edit summary |
No edit summary |
||
| Line 1: | Line 1: | ||
These instructions cover a stock Android | These instructions cover a stock Android 8.1.0 phone. If you have an Android tablet or a phone with customized software (some brands come with changes such as HTC, LG, and Samsung), some of the settings may be in different locations. | ||
Follow these steps to connect to your SMUS email from an Android device. | Follow these steps to connect to your SMUS email from an Android device. | ||
| Line 5: | Line 5: | ||
{| class="wikitable" | {| class="wikitable" | ||
|- | |- | ||
| Go to your device's settings || [[File: | | Go to your device's settings || [[File:1 Setting icon.png|250px]] | ||
|- | |- | ||
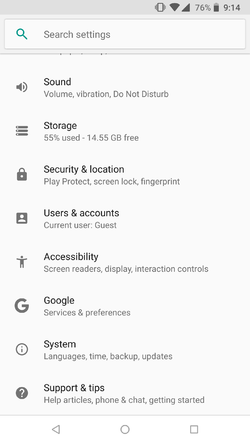
| | | Scroll down and choose "Add account" || [[File:2_email_android.png|250px]] | ||
|- | |- | ||
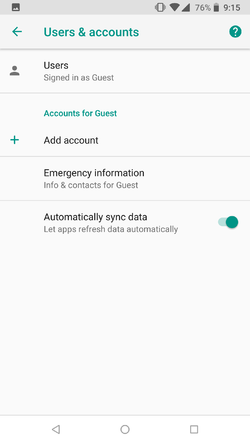
| Choose " | | Choose "Add account" || [[File:3_email_android.png|250px]] | ||
|- | |- | ||
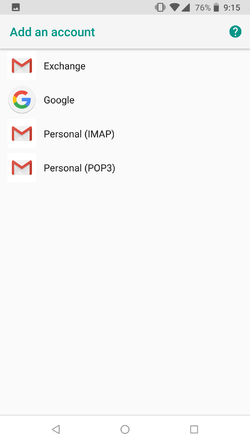
| | | Choose "Exchange" || [[File:4_email_android.png|250px]] | ||
|- | |- | ||
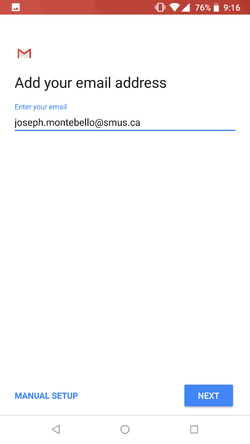
| | | Enter in your SMUS email address and tap next || [[File:5_email_android.png|250px]] | ||
|- | |- | ||
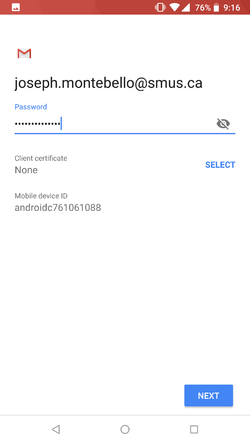
| | | Enter in your password and tap next || [[File:6_email_android.png|250px]] | ||
|- | |- | ||
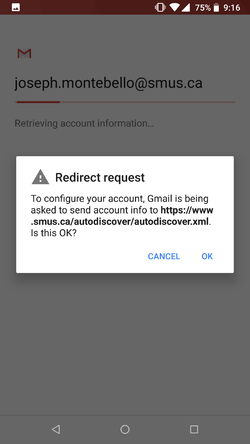
| | | Tap OK if prompted with a Redirect Request || [[File:7_email_android.png|250px]] | ||
|- | |- | ||
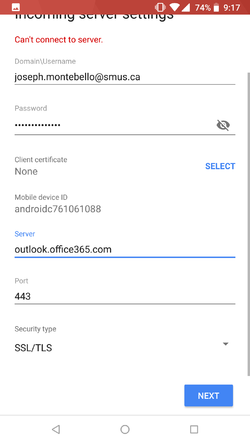
| | | Change the server name to outlook.office365.com and tap Next || [[File:8_email_android.png|250px]] | ||
|- | |- | ||
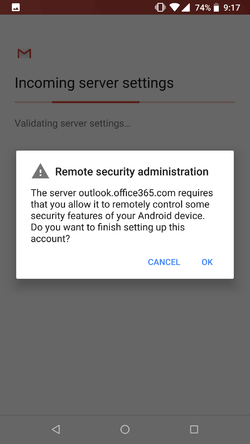
| Activate the device administrator || [[File: | | Activate the device administrator by tapping OK || [[File:9_email_android.png|250px]] | ||
|- | |- | ||
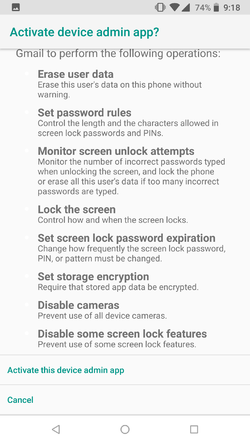
| View your | | Scroll down and tap "Activate this device admin app" || [[File:10_email_android.png|250px]] | ||
|- | |||
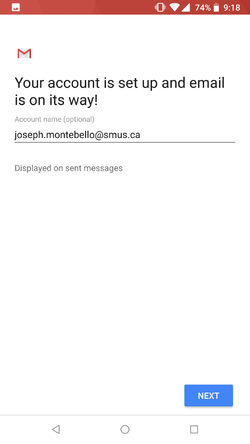
| Tap Next || [[File:11_email_android.png|250px]] | |||
|- | |||
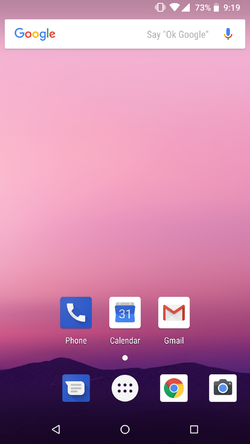
| View your contacts, calendar, and email using the standard Android apps || [[File:12_email_android.png|250px]] | |||
|} | |} | ||
Revision as of 10:47, 13 February 2018
These instructions cover a stock Android 8.1.0 phone. If you have an Android tablet or a phone with customized software (some brands come with changes such as HTC, LG, and Samsung), some of the settings may be in different locations.
Follow these steps to connect to your SMUS email from an Android device.
