SMUS Windows 10 Dorm Wired Connection: Difference between revisions
Jump to navigation
Jump to search
Sinan.soykut (talk | contribs) (Created page with "Follow these steps to connect a computer running Windows 10 to a student dorm connection. {| class="wikitable" |- | Start with your ethernet cable disconnected. Press the st...") |
Sinan.soykut (talk | contribs) No edit summary |
||
| Line 25: | Line 25: | ||
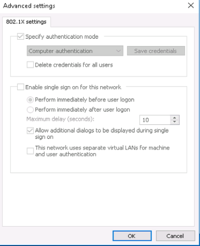
| In the Advanced settings window, check the "Specify authentication mode" box and change the authentication mode to "User authentication". Then, click "OK" on the Advanced settings window and "OK" on the Ethernet properties window. || [[File:15806-11.png|200px]] | | In the Advanced settings window, check the "Specify authentication mode" box and change the authentication mode to "User authentication". Then, click "OK" on the Advanced settings window and "OK" on the Ethernet properties window. || [[File:15806-11.png|200px]] | ||
|- | |- | ||
| Plug in the ethernet cable and | | Plug in the ethernet cable and enter your SMUS username and password, in the Windows Security window. Then click the OK button || [[File:15806-12.png|200px]] | ||
|- | |- | ||
| Click "Connect" when the Network Security Alert window appears again || [[File:15806-13.png|200px]] | |||
| Click "Connect" when the Network Security Alert window appears again || [[File:15806- | |||
|} | |} | ||
Revision as of 12:04, 30 November 2016
Follow these steps to connect a computer running Windows 10 to a student dorm connection.


