SMUS Microsoft Teams - Initial Setup: Difference between revisions
No edit summary |
|||
| (7 intermediate revisions by the same user not shown) | |||
| Line 2: | Line 2: | ||
== Log in == | == Log in == | ||
{| class="wikitable" | |||
|- | |||
| Open the website https://teams.microsoft.com and enter your email address || [[File:microsoft_teams_-_use_-_login_1.PNG|300px]] | |||
|- | |||
| Once redirected to the SMUS login page, enter your password and log in || [[File:microsoft_teams_-_use_-_login_2.PNG|300px]] | |||
|} | |||
== Create Team == | == Create Team == | ||
A Microsoft Team is a collaborative group. You can use a team as a departmental group, or any other collection of people working on a common task. | |||
= | {| class="wikitable" | ||
|- | |||
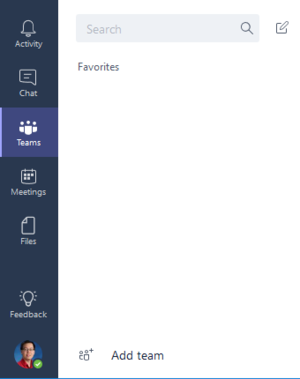
| Click into the Teams sidebar option, then click Add Team at the bottom || [[File:microsoft_teams_-_admin_-_create_team_1.PNG|300px]] | |||
|- | |||
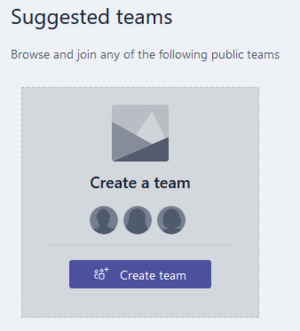
| Under Create a team, click the Create team button || [[File:microsoft_teams_-_admin_-_create_team_2.PNG|300px]] | |||
|- | |||
| Enter a team name and description, then choose Private or Public privacy (private is most suitable for departmental file shares) || [[File:microsoft_teams_-_admin_-_create_team_3.PNG|300px]] | |||
|- | |||
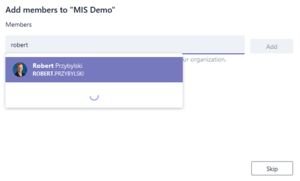
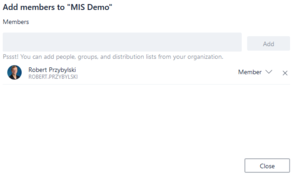
| Type a person's name into the members box, then select their name once the search completes || [[File:microsoft_teams_-_admin_-_create_team_4.PNG|300px]] | |||
|- | |||
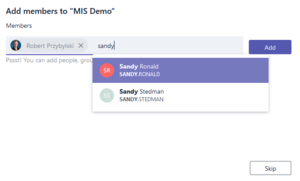
| Continue typing names and clicking their name once the search finishes || [[File:microsoft_teams_-_admin_-_create_team_5.PNG|300px]] | |||
|- | |||
| Once you have found the people to add to your team, click the Add button || [[File:microsoft_teams_-_admin_-_create_team_6.PNG|300px]] | |||
|} | |||
== Create Channels == | |||
Inside each Microsoft Team, you can create channels that divide the team up into tasks. For example, you might create a channel to work on one specific project, or for a series of related projects. | |||
{| class="wikitable" | {| class="wikitable" | ||
|- | |- | ||
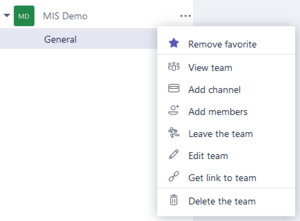
| | | In your list of teams, click the "..." and choose "Add channel" || [[File:microsoft_teams_-_admin_-_menu_1.PNG|300px]] | ||
|- | |- | ||
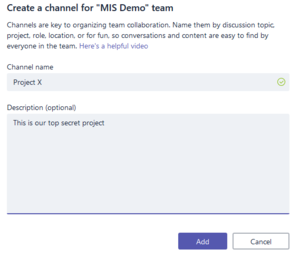
| | | Enter the channel name and a description, then click the Add button || [[File:microsoft_teams_-_admin_-_create_channel_1.PNG|300px]] | ||
|- | |- | ||
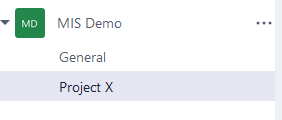
| | | The channel will now appear as a suboption under your Microsoft Team || [[File:microsoft_teams_-_admin_-_create_channel_2.PNG|300px]] | ||
|} | |||
== Create Tabs == | |||
Each channel can have multiple tabs of information available. A tab can contain a word document, an easily editable wiki, a project planner, a website, or some documents. We've found the most useful tabs to be wiki and planner. | |||
=== Wiki === | |||
Use a wiki tab to keep track of meeting minutes, or other text information that is easily separated into sections that needs to be edited by multiple people. | |||
{| class="wikitable" | |||
|- | |- | ||
| | | In your channel, click the "+" sign along the top list of options (Conversation, Files, + in this example), then choose Wiki || [[File:microsoft_teams_-_admin_-_create_tab_1.PNG|300px]] | ||
|- | |- | ||
| | | Enter the name of the wiki tab, then click Save || [[File:microsoft_teams_-_admin_-_create_wiki_1.PNG|300px]] | ||
|} | |||
=== Planner === | |||
Use a planner tab to keep track of a todo list. You can keep multiple buckets of tasks, with deadlines, assignees, and subtask lists for each task. | |||
{| class="wikitable" | |||
|- | |- | ||
| | | In your channel, click the "+" sign along the top list of options (Conversation, Files, + in this example), then choose Planner || [[File:microsoft_teams_-_admin_-_create_tab_1.PNG|300px]] | ||
|- | |- | ||
| | | Enter the name of the planner tab, then click Save || [[File:microsoft_teams_-_admin_-_create_planner_1.PNG|300px]] | ||
| | |} | ||
== Delete Tabs == | |||
| | |||
If you no longer need a tab, or accidentally create one that doesn't need to be there, you can delete it. | |||
{| class="wikitable" | |||
|- | |- | ||
| | | Click the down arrow next to the tab to be deleted, then click Remove || [[File:microsoft_teams_-_admin_-_delete_tab_1.PNG|300px]] | ||
|} | |} | ||
Latest revision as of 15:27, 2 June 2017
Follow these steps to create your own Microsoft Teams site and populate it with people, channels, and content.
Log in
| Open the website https://teams.microsoft.com and enter your email address | 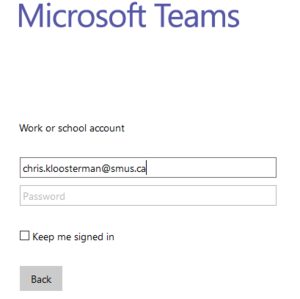
|
| Once redirected to the SMUS login page, enter your password and log in | 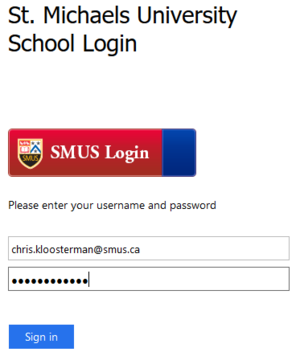
|
Create Team
A Microsoft Team is a collaborative group. You can use a team as a departmental group, or any other collection of people working on a common task.
Create Channels
Inside each Microsoft Team, you can create channels that divide the team up into tasks. For example, you might create a channel to work on one specific project, or for a series of related projects.
Create Tabs
Each channel can have multiple tabs of information available. A tab can contain a word document, an easily editable wiki, a project planner, a website, or some documents. We've found the most useful tabs to be wiki and planner.
Wiki
Use a wiki tab to keep track of meeting minutes, or other text information that is easily separated into sections that needs to be edited by multiple people.
| In your channel, click the "+" sign along the top list of options (Conversation, Files, + in this example), then choose Wiki | 
|
| Enter the name of the wiki tab, then click Save | 
|
Planner
Use a planner tab to keep track of a todo list. You can keep multiple buckets of tasks, with deadlines, assignees, and subtask lists for each task.
| In your channel, click the "+" sign along the top list of options (Conversation, Files, + in this example), then choose Planner | 
|
| Enter the name of the planner tab, then click Save | 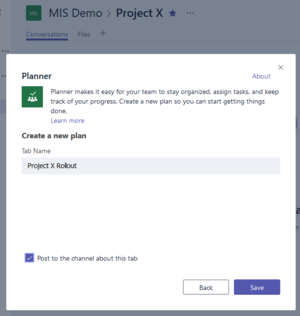
|
Delete Tabs
If you no longer need a tab, or accidentally create one that doesn't need to be there, you can delete it.
| Click the down arrow next to the tab to be deleted, then click Remove | 
|
