SMUS Windows 8 Dorm Wired Connection: Difference between revisions
Jump to navigation
Jump to search
(Created page with "Follow these steps to connect a computer running Windows 8 to a student dorm connection. {| class="wikitable" |- | Start with your ethernet cable disconnected. Press the sta...") |
No edit summary |
||
| (One intermediate revision by the same user not shown) | |||
| Line 3: | Line 3: | ||
{| class="wikitable" | {| class="wikitable" | ||
|- | |- | ||
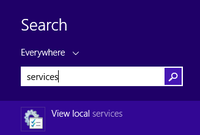
| Start with your ethernet cable disconnected. Press the start button, type "services" in the search box and click the "View local services" option in the search results || [[File: | | Start with your ethernet cable disconnected. Press the start button, type "services" in the search box and click the "View local services" option in the search results || [[File:win81_8021x_step1.png|200px]] | ||
|- | |- | ||
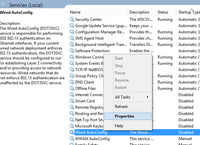
| In the Services window, right click "Wired AutoConfig" and choose "Properties" || [[File: | | In the Services window, right click "Wired AutoConfig" and choose "Properties" || [[File:win81_8021x_step2.png|200px]] | ||
|- | |- | ||
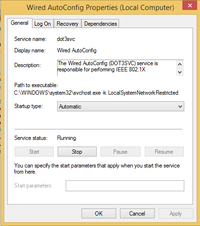
| In the Wired AutoConfig Properties window, change the Startup type to "Automatic" and click the "Start" button, then click the "OK" button. Close the Services window. || [[File: | | In the Wired AutoConfig Properties window, change the Startup type to "Automatic" and click the "Start" button, then click the "OK" button. Close the Services window. || [[File:win81_8021x_step3.png|200px]] | ||
|- | |- | ||
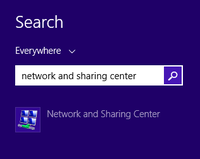
| Press the start button, type "network and sharing center" in the search box and run the Network and Sharing Center in the search results || [[File: | | Press the start button, type "network and sharing center" in the search box and run the Network and Sharing Center in the search results || [[File:win81_8021x_step4.png|200px]] | ||
|- | |- | ||
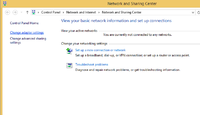
| In the Network and Sharing Center window, click the "Change adapter settings" link in the sidebar || [[File: | | In the Network and Sharing Center window, click the "Change adapter settings" link in the sidebar || [[File:win81_8021x_step5.png|200px]] | ||
|- | |- | ||
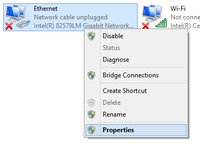
| In the Network Connections window, right click | | In the Network Connections window, right click "Ethernet" and choose "Properties" || [[File:win81_8021x_step6.png|200px]] | ||
|- | |- | ||
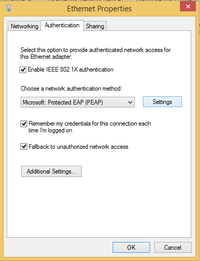
| In the | | In the Ethernet window, choose the "Authentication" tab. Click the "Settings" button beside the network authentication method. || [[File:win81_8021x_step7.png|200px]] | ||
|- | |- | ||
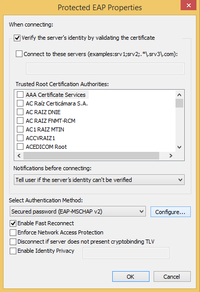
| In the Protected EAP Properties window, click the "Configure" button || [[File: | | In the Protected EAP Properties window, click the "Configure" button || [[File:win81_8021x_step8.png|200px]] | ||
|- | |- | ||
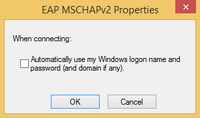
| In the EAP MSCHAPv2 window, uncheck the "Automatically use my Windows logon name and password" option, then click OK. Click OK on the Protected EAP Properties window as well. || [[File: | | In the EAP MSCHAPv2 window, uncheck the "Automatically use my Windows logon name and password" option, then click OK. Click OK on the Protected EAP Properties window as well. || [[File:win81_8021x_step9.png|200px]] | ||
|- | |- | ||
| Back in the | | Back in the Ethernet window, click the "Additional Settings" button near the bottom || [[File:win81_8021x_step7.png|200px]] | ||
|- | |- | ||
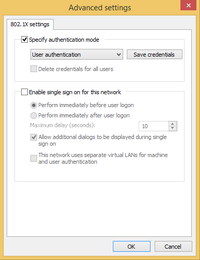
| In the Advanced settings window, check the "Specify authentication mode" box and change the authentication mode to "User authentication". Then, click "OK" on the Advanced settings window and "OK" on the | | In the Advanced settings window, check the "Specify authentication mode" box and change the authentication mode to "User authentication". Then, click "OK" on the Advanced settings window and "OK" on the Ethernet properties window. || [[File:win81_8021x_step10.png|200px]] | ||
|- | |- | ||
| Plug in the ethernet cable and click | | Plug in the ethernet cable and click "Connect" when the Network Security Alert window appears || [[File:win81_8021x_step11.png|200px]] | ||
|- | |- | ||
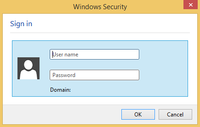
| In the Windows Security window, enter your SMUS username and password, then click the OK button || [[File: | | In the Windows Security window, enter your SMUS username and password, then click the OK button || [[File:win81_8021x_step12.png|200px]] | ||
|- | |- | ||
| Click | | Click "Connect" when the Network Security Alert window appears again || [[File:win81_8021x_step11.png|200px]] | ||
|} | |} | ||
Latest revision as of 11:41, 3 April 2014
Follow these steps to connect a computer running Windows 8 to a student dorm connection.
